Showing posts with label CAL. Show all posts

Thursday, September 29, 2022

Strawberry Square - Community Garden CAL

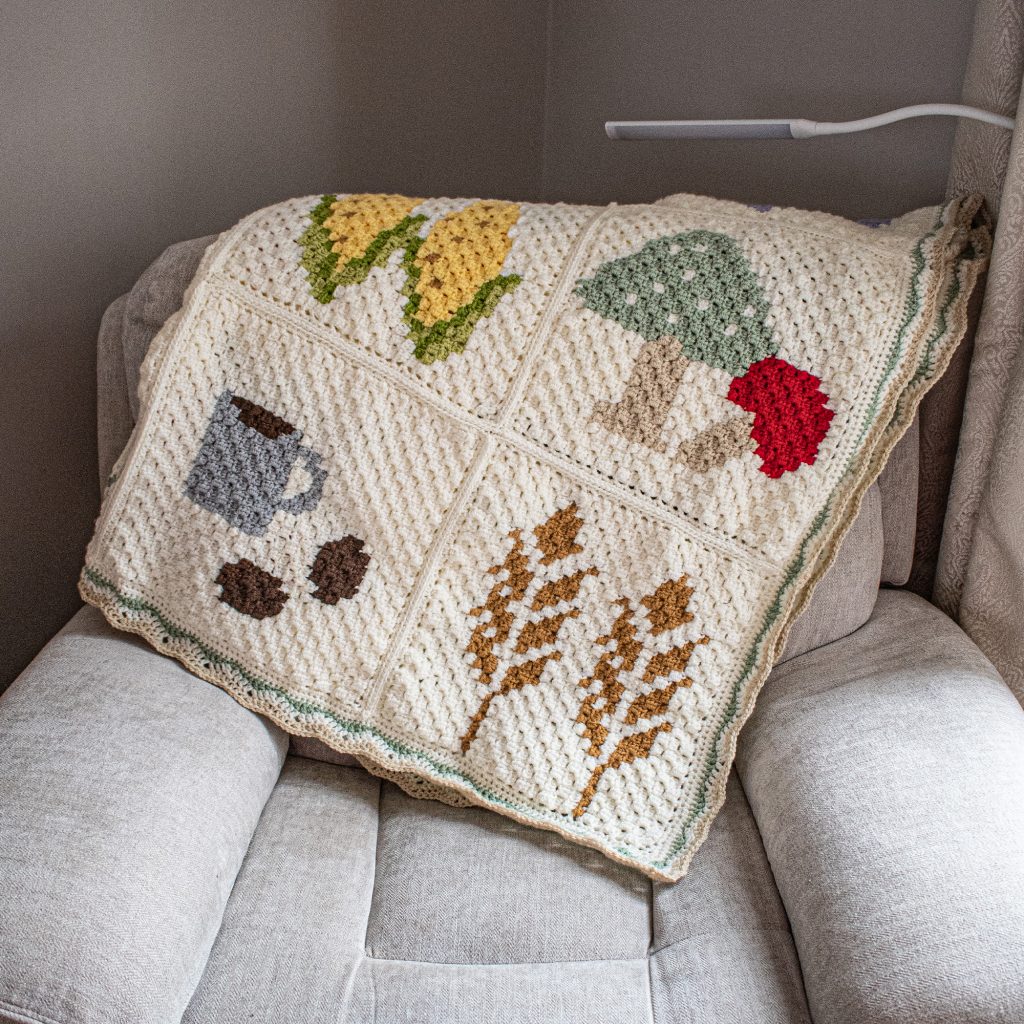
 Welcome to my blog and the latest square in the Community Garden Crochet A Long! 


If you've found your way here without knowing what the CGCAL is, please head over to the Sunflower Crochet Cottage Blog and read about it here, then don't forget to come back! 


Keep reading, the free graph is at the end of this blog post!

There are 2 ways to join this event.

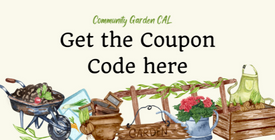
  1. Collect the pdf patterns as they become available. A new square will be released every Monday, Wednesday and Friday until October 12th. Then we will join and border our blankets. The PDFs will be available either for the duration of the CAL or a couple of days, but the patterns will be available for free from the designers’ blog posts for at least the duration of the CAL. The round-up below will let you know as the squares become available and what the coupon codes etc you need are. All you need to do is scroll down to that square’s photo, grab the code and click the photo to be taken to the link you need.
  2. Don’t want to wait for the squares to become available? Want to start your favourites right now? Concerned you may miss something by collecting them one by one? That’s OK! There is an e-book available for you to purchase for an amazing $12.99.


WHAT DOES THE E-BOOK INCLUDE?

The 132-page e-book has been lovingly collated and contains:

  • A contents page so you can easily find the square you would like to work on and print out specific pages if you do not want to print out the whole thing in one go
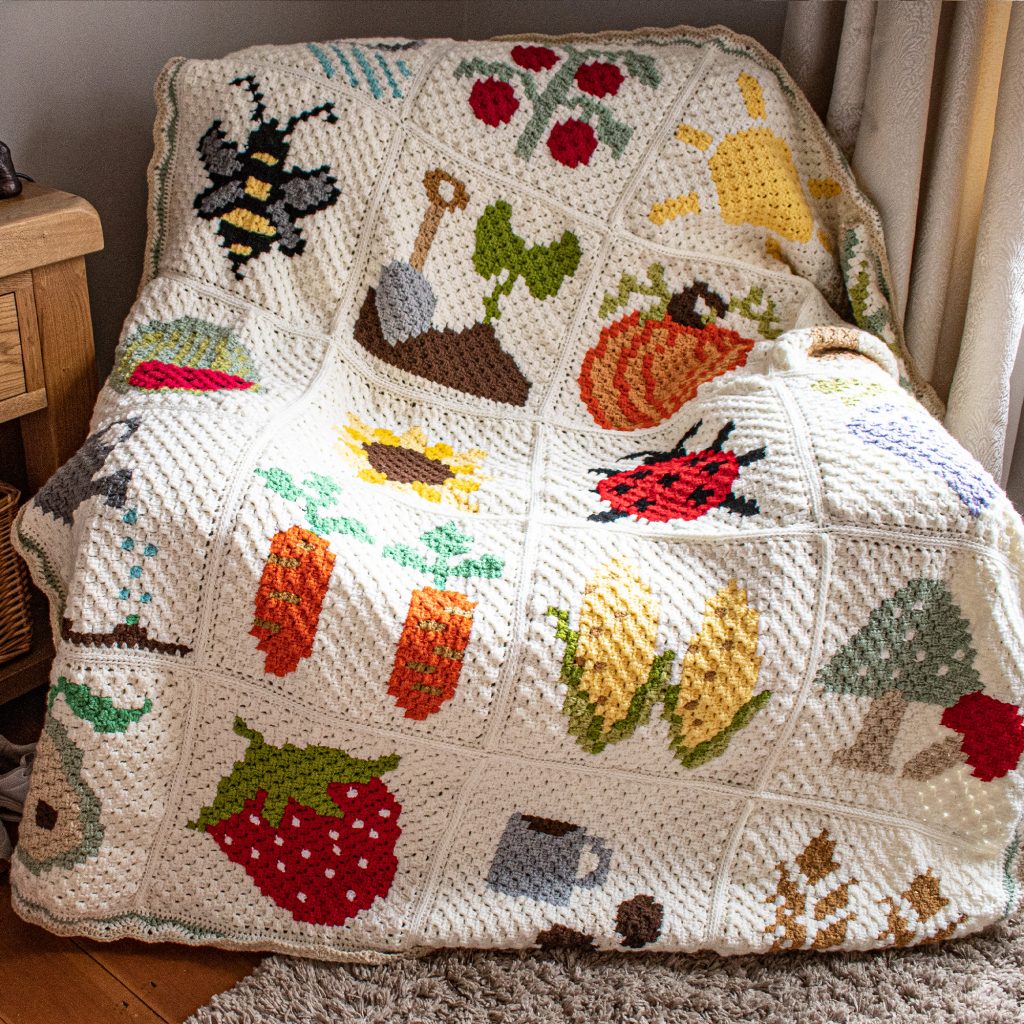
  • All 20 featured squares – chart, written and colour block instructions for each square.
  • PLUS 4 bonus squares that are currently not available anywhere else!
  • A step-by-step photo tutorial for how to do the joining method I used
  • Written instructions for the stunning border 
  • Designer credits – a list of the places to find each participating designer and how to get in touch with them. So if you would like to follow them on social media that would be welcomed!


About the Strawberry Square
Depending on your background colour, you only need three colours to make the strawberry square, red, green and white. If you want to use another background colour - then make sure you have white, off-white or even yellow for the seeds. 


I used 8ply/DK weight yarn and a 4mm hook and my square measures  35cm/ 15 inches
Helen (from Sunflower Crochet Cottage) has used Aran weight yarn (Paintbox Simply Aran) and a 5mm hook. Her squares measure approx. 46cm/18 inches. You'll also need scissors and a tapestry needle. It's a good idea to wind off sections of yarn to create bobbins, which eliminates long floats of yarn at the back of the work. 


I've been so delighted by the finished blanket, but you can make fewer or more squares - double up on your favourites, to fully customize your blanket. 

The blanket is designed using the traditional corner-to-corner method (6 chains and 3 dc/ tr (UK), but you could use the mini C2C technique (5 chains and 3hdc/htr (UK) 

NEW TO CORNER TO CORNER?

Look at Sunflower Crochet Cottage's learn to corner to corner course.


OK, now you are ready for the graph, right?


This graph will stay here, free, on my blog, and a PDF copy will be available on Ravelry if you'd like to own your own copy - please note, the Ravelry download is a chart only. Make sure you get the code before you download (Code is live on 30th September - if you are too early, check back later!)


Then once you have the code, you can download a chart from Ravelry by this link. If you'd like to share a project on Ravelry, you can also link it to the pattern page. 


Happy Crocheting, Emma. 

Copyright © 2022 Emma Wilkinson Designs All Rights Reserved No restrictions are placed on finished items made with this pattern, however, the pattern may not be resold or copied in any form. Pictures remain the property of Emma Wilkinson Designs 

Friday, April 8, 2022

Buttercup Square - Bouquet of Flowers CAL

 Hi there! Today I am bringing you my contribution to the Bouquet of Flowers CAL - the Buttercup Square!


The CAL has been running since the 28th of February, but it's never too late to start a CAL!

As you might have guessed, the Bouquet of Flowers CAL follows a floral theme, with each designer contributing a square that captures the theme for them. 

You can read all about the CAL here, at our host's blog: Sunflower Cottage Crochet - which also includes links to all the other squares, the codes for free downloads, and at the end of the cal, the beautiful border. 


If you don't want to wait for the CAL squares that have not been released, there is the option to purchase the bundle now - and own all the patterns. you can do this by clicking on the 'Buy the Bundle' button below. 


My square is called the Buttercup Square. I chose to make it in a single colour - buttercup yellow! but it's totally up to you if you want to try each round in a different colour, or experiment with whatever takes your fancy. The Buttercup Square has a 3d element, which is achieved by back post stitches - but I would say this square is suitable for anyone who has mastered the basics. I have included some 'unusual joins' to minimize cutting yarn if you choose to keep it one single colour. This pattern is written in us terms. 


For my square, I used Stylecraft Special DK, some other alternatives are Paintbox DK, Fiddlesticks 8ply or any great quality 8ply/DK weight yarn. I used approximately 30g, so this can be a great stash diving square!

I've also used a 4mm crochet hook. you'll also need a needle for the ends and scissors. 

The pattern will remain free here on my blog (keep scrolling for the pattern) But if you'd like to own a PDF copy, you can purchase one from Ravelry by clicking this link below.


Abbreviations (US terms): 

ch – chain  
sc – single crochet 
dc – double crochet 
hdc – half double crochet 
BPsc – Back Post single crochet 
BL – back loop 
2dc-cl – 2 double crochet cluster (see below) 
sl st – slip stitch 
st/s - stitch/es 
sk - skip 
sp- space 
YO – yarn over 


Special stitches: 

2dc-cl – 2 dc worked together to form 1 st  

Method: *YO, hook into next st, pull up loop, YO, pull hook through 2 loops on hook, rep from *, YO, pull hook through 3 loops on hook 

Hdc join – half double crochet worked into the first stich of the row, to join round.  This counts as chains, and starts the next row in the centre of the chain space just made. Also used sc/dc join.  

BPsc back post single crochet 

Method: Hook around next post (from back to front) YO, pull up loop, YO, pull hook through both loops on hook.  

For more information on this join – please refer to this blog post


Pattern 

Make a magic ring 

R1: ch 3 (counts as dc) 11dc, sl st to close (12dc) 

R2: ch 4 (counts as 1dc, 1ch) *1dc, 1ch, into next st, rep from * around, sl st to 3rd ch to join (12dc, 12ch) 

R3: ch 3, dc in same st (counts as 2dc-cl), 2dc-cl in same st, ch1, *(2x2dc-cl, ch1) in next st, rep from * around, sl st to 1st st to join (24 2dc-cl, 12 ch) 

R4: sl st in next 2dc-cl, *(sc in next chsp, ch3) rep from * around, sl st to 1st sc to join. (12sc, 36ch) 

R5: sl st into next chsp, 3ch (counts as dc) 3dc in same chsp, ch1, *(4dc in next chsp, ch1) rep from * around, sc join to 1st st. (48dc, 12ch) 

R6: ch 1, sc in chsp just made, sk 2 dc, 5dc in next st (3rd dc in cluster) *sc in next chsp, sk 2 dc, 5dc in next st, rep from *, sl st join (60 dc, 12 sc 

R7: ch 1, BPsc around sc, *6ch, *BPsc around next sc,  rep from *10 times, ch3, dc join in 1st st. (12BPsc, 72 ch 


R8: ch3, 2dc into same chsp, (5ch, sc in next chsp,) (7ch, sc in next chsp) 5ch, *(3dc, 2ch, 3dc) into next chsp, (5ch, sc in next chsp,) (7ch, sc in next chsp) 5ch, rep from * twice, 3dc in next ch sp, hdc to 1st st  to join. (8sc, 76ch) 

R9: ch3, (counts as dc) 2dc into hdc sp, ch1, (4dc, ch1) into ch-5sp, (3dc, ch1, 3dc, ch1) into ch-7 sp,  (4dc, ch1) into ch-5 sp, *(3dc, ch2, 3dc, ch1) into next ch-2sp, (4dc, ch1) into ch-5sp, (3dc, ch1, 3dc, ch1) into ch-7 sp, (4dc, ch1) into ch-5 sp, rep from * twice, 3dc in hdc sp, hdc join. (80dc, 28ch) 

R10: ch3, (counts as dc) 2dc into hdc sp, 25dc, *(3dc, ch2, 3dc) into next ch-2 sp, 25dc, rep from * twice, 3dc (in hdc sp), hdc join. (124 dc)  

R11: ch 3, (counts as dc) dc into hdc sp, *[ch1, sk1, dc in next st] 14 times, ch1 (2dc, ch2, 2dc) in ch-2sp, rep from * twice, [ch1, sk1, dc in next st] 15 times, 2dc (in hdc sp), hdc join. (76dc, 72ch) 

R12: ch2, (counts as hdc) hdc in hdc sp, 35hdc, *(2hdc, ch2, 2hdc) in ch-2sp, 35hdc, rep from * twice, 2dc (in hdc sp), hdc join. (156 hdc, 8ch) 

R13: ch2, (counts as hdc) hdc in hdc sp, 39BLhdc, *(2hdc, ch2, 2hdc) in ch-2sp, 35BLhdc, rep from * twice, 2dc (in hdc sp), hdc join. (172 hdc, 8ch)  


Finishing. 

Fasten off and weave in ends  

For best results block to 10 sq inches 


As always, Happy Crocheting,

Emma