Showing posts with label crochet. Show all posts

Tuesday, February 28, 2023

Sky Scarf - Free Pattern - With Sun and Rainbow Motifs


Sky Scarf was published in 2015 - one of my first patterns! A third-party company picked it up and it has been unavailable since then. I've now fixed up a few of my 'rookie' mistakes and brought it here to the blog. 

The main part of the scarf is long and thin, designed to be looped three times around. This pattern is great for stash busting; but please, keep the same yarn thickness and fibre if you are substituting. Motifs can be permanently attached by sewing in place, or if you’d like to alternate them, add snap fasteners to the rainbow and/or a brooch back to the sun. Main Scarf and Rainbow motifs are worked in rows, and the Sun motif is worked in the round.  

A fun idea could be to match the scarf to the sky outside, as you make it, if you plan to work over a few days! 


Materials: 

Yarn: Approx 25 grams of 8ply each of sky blue, grey, and white for the main scarf.

 AND/OR Approx 5 grams of red, orange, yellow, green, blue, indigo, and violet 

AND/OR 5 grams of golden yellow. 

Hook: A 4mm crochet hook (G/5) 

Notions: stitch markers, yarn needle – 

OPTIONAL – snap fasteners or pin/brooch back 

Skill level: Beginner

Written in US terms.


Special Stitches:

Ps: Popcorn = 5dc; then , taking your hook out, reinsert back into the top of the first dc, and into the last dc, yarn over and pull through. 

p: picot = Ch 3, sl st back into 1st ch.

Full list of abbreviations at the end of the pattern. 


Main Scarf: 

With Grey, make a chain of 333. 

Row 1: Sk the first 3 chains (counts as turning chain) and dc across to the last chain, turn. (331 dc) 

Row 2 -3: Ch 3 (counts as first dc) 330 dc across, turn (331 dc) 

Row 4: With White, rep Row 2 Rows 5-7: 

With Sky Blue rep Row 2. 

Fasten off and weave in ends, and join the two short sides together to create an infinity scarf. 

Rainbow Motif is attached.


Rainbow: 

With Red, make a chain of 34 

Row 1: Sk 1st ch, sc across to last ch, turn (33 sc)

Row 2: Ch 1 (not counted as st) 33 sc 

rep Row 2 once more with red, and continue to repeat Row 2 three times in the colour sequence; orange, yellow, green, indigo/purple, violet/pink 

Fasten off and weave in ends. 

Sun Motif Attached.


Sun Motif: 

Using Yellow, make a magic loop. 

Round 1: ch 1, 6 sc into loop, and pull to secure. Do not join, continue as a spiral. (6 sc) 

Round 2: 2 sc into each st. (12 sc) 

Round 3: *2 sc into next st, 1 sc into next, rep from * around. (18 sc). 

Round 4: *2 sc into next st, 1 sc into next sts, rep from * around. (24 sc) 

Round 5: *Ch 3, Ps into next dc, ch 3, sc into next stitch, rep from * 10 times, Ch 3, Ps into next sc, ch 3, sl st to first st. (12 Ps) 

Round 6: *Ch 6, sk Ps, sl st into next sc, rep from * 11 times, sl st into 1st ch-6 sp of round (12 sl st)

Round 7: Ch 3 (counts as dc) 3 dc in same ch-6 sp, p, 4dc in same ch-6 sp, * 4 dc in next ch-6 sp, p, 4 dc in same ch6 sp, rep from * 10 times, sl st to 3rd ch. (56 dc, 12 p)

Fasten off and weave in ends

Attach the motifs as desired, the rainbow can fit around the looped scarf to keep it in place. 


Abbreviations 

US terminology: 

ch – chain 

sc - single crochet

dc– double crochet 

p – picot (see above)

Ps – popcorn stitch (see above) 

sk – skip 

sl st – slip 

stitch st/s – stitch/es 

rep - repeat 


I hope you enjoy this beginner-friendly infinity scarf! 


Happy Crocheting,


Emma 

Copyright © 2015, 2019, 2023 Emma Wilkinson Designs All Rights Reserved No restrictions are placed on finished items made with this pattern, however, the pattern may not be resold or copied in any form. Pictures remain the property of Emma Wilkinson Designs 

Monday, November 23, 2020

4 Tips for Teaching Kids Crochet and Yarn Crafts


I've taught a few classes, in a few different situations, and today want to give you some tips for teaching crochet, and other yarn crafts to kids.


These are going to depend on the age of the children, class size and how long you have - whether or not it's a one time class or on going. Each of these should be considered to plan a great lesson. 


Tip #1

Stick to chains.

This is a crochet specific tip. If you have a limited time, I'd recommend just learning chains as an introduction to crochet, especially if it's a one off class. It teaches kids to hold to hook and yarn, how to get them to flow together and even a lesson in tension. The finished chain could be made into a bracelet or necklace! 

If you have the time to go one step further and introduce a slip stitch or single crochet - crochet mesh is also a great first project- it grows fast and still uses mostly chains.

These Chain Loop Pom Poms are a great pattern to work with chains


This Loopy Worsted Necklace is a little more advanced, but can be something that is worked up to 


Keep reading to the end for some more chain ideas!

Tip #2

Forget the chains.

OK, yes this is completely contradictory advice, but my next tip is to start off the work. Work a few rows and have them build up from it, either from a granny square or simple rows back and forth. This also works for knitting. I've found the hardest concept in teaching crochet is the foundation row, and how and why we skip chains, and same for knitting and casting on. The actual stitches can be fun to learn, but if you are too bogged down in all the things you need to know to start it can be difficult. I find half double crochets a good first stitch to learn. They have one less action than a double, but still incorporate the yarn over. from there you add or subtract an action to make different stitches. It seems a bit obvious to say, but for knitting - stick to basic knit/garter stitch. 


premake a few squares to get everyone started!
Use my Good Old Granny Squares pattern.


Tip #3

Be patient.

This goes for kids and adult alike - crochet and knit are supposed to be very relaxing, but for a beginner it can be the exact opposite. Take it slow, think of several ways to explain a concept and one might stick. Some people need to know why they are doing something, and others will just need to know how. 


Tip #4

Complete an item.

I've found most students like to work to an end goal. A scarf for a toy or a washcloth are good uses for little swatches, or even add them as an embellishment to something bigger makes the end goal more impressive.


Thanks for reading,


Happy Crocheting (and knitting!)


Emma

LoveCrafts

Monday, September 28, 2020

Two new Patterns - Rose Sisters

 This month I released some new patterns.. and totally spaced on sharing them here!


First up is the Rosebud Wrap - This one is designed to showcase your favourite gradient yarn.


Link to Ravelry 

I've used a Stenli Muffin - a yarn from Bulgaria! This is a huge 2000 m thread cake, which means it's made of three threads held together - not plied - and the colour changes happen as one thread at a time is changed over. 

I've also included a chart with the fully written pattern (US terms). 

Rosebud is named after the little clusters within the design, and also as a sister piece to go along with the Primrose Wrap

Which is the second release!

Primrose is a re - release,updated to include a chart, and written in US terms. Primrose is also still 'under contract' through Bendigo Woollen Mills, and they are selling the UK version - via their own website and on Ravelry. I will be selling mine via Etsy and Lovecrafts. 

Primrose was one of my first patterns I wrote! This one uses 2 colours in 4ply cotton - I've used Bendigo Cotton in 'Primrose' - where the name came from! and 'Snow'. Sadly the Primrose colour has been discontinued. 

Link to Etsy

Link to Lovecrafts


If you get a chance to make one - please let me know via social media. And don't forget to sign up for my newsletter - that way you don't wait to hear about new releases! You can do that by clicking here


Thanks for reading and Happy Crocheting


Emma

Monday, March 23, 2020

Wildflower Necklace - free pattern


I've got another free pattern for you today - The wildflower necklace.


This one started out as a kit - the pattern and all the yarn you needed to make a necklace.


It's a great pattern for beginners who have mastered the basic stitches, and want to start working in rounds. It's also great for advanced crocheters who want to make themselves something quickly.


I love having one of these to wear to crochet events - yarn shows, even networking events - where I want people to see I'm a crocheter, but it's too hot to wear a scarf or beanie.


They would also be great as a craft fair item.


It also works as a teething necklace! One mum can wear, and baby can grab.


Wildflower Necklace was originally available in 5 colours, which were named after Australian native plants and flowers from the Muogamarra nature reserve - hence Wildflower necklace. My favourite colourway is Eucalyptus. If you've been following me for a while, that won't be a surprise.


Yarn:
Scheepjes Catona, 100% cotton 25g / 62.5 m x 3 balls.


You can make your own colour combinations, but if you'd like to copy what was in the kits:

Ironbark – 106, 074, 501

Eucalyptus – 505, 506, 528 (pictured)

Native Orchids – 146, 208, 413

Waratah – 252, 264, 523

Muogamarra - 113, 385, 514


Hook: 3 mm

Notions: Yarn needle, fibre fill, stitch marker.

Gauge: 2.5 cm = 8 sts x 6 rows of sc


This pattern uses US terms and works in a continuous spiral. Use a stitch marker at the end of each row to keep track.


Abbreviations used:


sc   = single crochet

st/s = stitch/es

inv dec = invisible decrease; hook into front loop only of two stitches to be decreased, YO, draw through 2 loops on hook.


Bead (Make 3)

Make a magic ring

Round 1: 6 sc into loop, pull to secure. (6 sc)

Round 2: 2 sc into each st around. (12 sc)

Round 3: *2 sc into next st, sc into next; rep from * around. (18 sc)

Round 4: *2 sc into next st, sc into next 2 sts; rep from * around. (24 sc)

Round 5 - 8: sc around.

Round 9: *inv dec, sc into next 2 sts, rep from * around. (18 sc)

Begin adding fibre fill.

Round 10: *inv dec, sc into next st, rep from * around. (12 sc)

Round 11: *inv dec, rep around. (6 sc)

With yarn needle, cinch to close. Fasten off, Weave in ends.


Cut two lengths of cotton, in any colour, 90 cm long.
Using needle, thread the two lengths of cotton through centre of middle bead, starting at magic loop and ending at final cinch.


Thread other two beads on to cord, with magic loop on the outer edge of each side (the magic loop and increase side of the bead will be the neatest)
Secure with a knot on each side of beads
Make your necklace adjustable. Tie a knot at each end, around the cord. Trim as needed.


Thanks again for reading,


Happy Crocheting


Copyright © 2020 Emma Wilkinson Designs All Rights Reserved
No restrictions are placed on finished items made with this pattern, however the pattern may not be resold or copied in any form. Pictures remain the property of Emma Wilkinson Designs


Wednesday, March 11, 2020

Stitch Conversion - UK to US crochet terms


Almost 10 years ago I published a crochet stitch conversion chart on my blog! It's one of the trickiest things about crochet for beginners - because sometimes it takes a while to even find out there are two separate 'languages'


Well, I thought it was time for an update! You can save this to your phone, add to pinterest, or print out a copy to keep handy!


I do tend to favour US terms, but some of my patterns are available as both, or with a 'translation' if it's a simple stitch repeat. US terms appear to be more common, but that's only to be expected. (Based on population!)


Just a quick post from me today!


Have a great day crocheting!


Emma


Tuesday, March 3, 2020

Heather Beanie (the Twisted Thistle)


Last year I wrote up a quick beanie pattern for a special fluffy yarn - the Thistle Beanie.

                              That pattern is up on the Yarnish Blog and you can find it here.

This Beanie pattern was a part of Made with a Twist's 'Top 10 One Hour Beanie Blog Burst'  and that post can be found here


Over Summer, I had one ball of the Softie yarn (pictured above), and I made a spiralized version of the thistle beanie - and I decided to name it 'Heather'. The original Thistle beanie evoked imagery of a Scottish thistle, and Heather is another iconic Scottish flowering plant - a perfect match! I've also worked up a few beanie's in the Hook Nook's 'Yummy' yarn - which gives it much more definition 


Get the ad-free PDF
For both the Heather and Thistle Beanie
and Etsy


Above - Heather and Thistle Beanies, in a different yarn. 


Heather is a fairly easy pattern to read, however, if you choose a fluffy yarn it can be a bit challenging. I recommend using a stitch marker to mark the first and last stitch of each row.

As usual - US terms are used, but we can easily translate the half double crochet to a half treble crochet in UK terms. 

Heather will fit most adult heads (58 cm circumference) and can be worn slouchy - or with the brim turned up. 

I also made a white version from my stash (unknown yarn) Same thickness, but much denser. I had to use a bigger hook to achieve the same drape - which is a good reminder when substituting yarns - to always check, whether that's to make a swatch, or evaluate after a few rows to see how it's going. It's also worth mentioning that yarn weights are based on a range - and it is more noticeable as the yarn increases in size.

If you need to make the beanie even faster - why not try Lion Brand's Wool Ease Thick and Quick and a 10 mm hook. 


Materials needed:

Abbreviations Used:

ch – chain
hdc – half double crochet
hdc2tog - crochet two hdc stitches together
sk – skip
st – stitch
BLO – Back Loop Only
( ) – indicate stitches worked in same stitch.

chains are not counted as a stitch throughout 


Begin:


Make a chain of 42

Row 1: sk 2ch, 40 hdc across, turn. 40 hdc
Row 2: ch2, BLOhdc2tog, 37 BLOhdc, (2 BLOhdc) in last st,  turn. 40 BLOhdc
Row 3: ch2, (2 BLOhdc) in 1st st, 37 BLOhdc,  BLOhdc2tog, turn. 40 BLOhdc

Repeat rows 2 and 3 for a total of 34 rows, or the desired width reached. 
Join row 34 to foundation row to make a tube (pictured below) with needle, or crochet together if preferred. Cinch one end closed. 


Weave in all ends.


Thanks for reading, and as always, Happy Crocheting

Emma 


Copyright © 2020 Emma Wilkinson Designs All Rights Reserved

No restrictions are placed on finished items made with this pattern, however, the pattern may not be resold or copied in any form. Pictures remain the property of Emma Wilkinson Designs


Sunday, March 1, 2020

Rainbow Connections


Today I'd like to share a round up of Rainbow Crochet patterns. It's almost St Patrick's Day, and you might find a pot of gold under one!

The round up is also to celebrate the original Fruit Cup Fade being available as a single PDF doc on Ravelry!


The Fruit Cup Fade Blanket - There are two versions, a rectangle and a square - and both a free on the Yarnish Blog - however you can get the original Fruit Cup Fade (rectangular) as one document as a paid PDF (click this link)


Some other fun rainbow patterns I have found this week are:

 click on the highlighted link for more info

These Rainbow Mini Mandala Earrings really caught my eye! By Devine Devrie


Did you see Crochet to Play's Shamrock Hair Clip? perfect quick make!


Clare from Bobwilson has made a sampler wrap - that could also be a blanket. I Love versatile patterns.


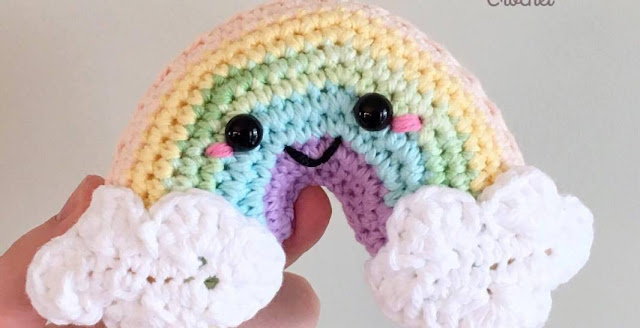
Roy the Rainbow from Spinayarn Crochet is rocking some pastel tones, and looking so cute.


Prisma Hat by My Hobby is Crochet is another great way to wear a rainbow


Over the Rainbow Wall Hanging from Crochetastic Boutique is a unique way to get some colour into your decor.

 Lucky Rainbow Scarf from Karen Lucas is so much fun! (below right)


And finally another one  from me - the Sky Scarf - features a little rainbow accent! (above left)


Until next time,
Thanks for reading and Happy Crocheting!

Emma

Saturday, January 11, 2020

Introducing ... Kirra the Koala


Last week Kirra Koala was released as a new pattern. I only started working on her on New Year's Eve, and once she was finished, it seemed a shame not to write the pattern.

The last few months have been devastating for the koala population in Australia, due to the terrible bush fires you have no doubt heard about. Straight away I knew that proceeds from the pattern should go to help.

I quickly assembled some pattern testers. Sara has tested for me before, and is also involved as a rescue carer herself. She and Emma (another koala carer) pointed me in the direction of the Avian Reptile and Exotic Pet Hospital (AREPH) as well as WIRES as two worthy charities. Ruben, the Koala has had medical treatment from the AREPH, and is currently undergoing care. 


$2.00 from every pattern sold this January will be split between the two charities, which will be donated at the end of the month. I will continue to donate sales from the pattern each month, and if the charity or amount changes, I will be fully transparent about that. 


If you would like to donate directly to each of those charities you an do so here:


Since releasing the pattern, Sara has auctioned off her Kirra that she made, and has so far raised $200! Amazing effort!  


Kirra Koala is made using 100% Australian Merino wool from Nundle woollen mills, which keeps much needed funds in our rural communities.
Other supplies needed: 12 mm saftey eyes, 2.5 mm crochet hook, stuffing, yarn needle, small amount of black yarn (dk or similar)
Thank you for reading, and I hope you are able to help! 

Emma. 


Thursday, January 2, 2020

Never Ending Story Shawl

Hello 2020!


Over the last few months I've been really into simple repetitive stitches, embracing the relaxing element of crochet. Zen crochet, you might want to call it. I've also been a bit obsessed with moss stitch - which is also known as linen stitch. Either name, it's a great stitch.


I've been making a one row repeat shawl - which means it can go on forever, or be as short as you like. It's a great travel or TV project and since it is worked entirely in single crochet and chains to make a moss or linen stitch, it is a perfect shawl for beginners.


I've called it the Never Ending Story Shawl - for obvious reasons!

The beginning chain creates a ripply little border.


This pattern will be released as a PDF - and I'll update this blog post when that is.


Materials I have used  


  • Yarn: Bendigo Woollen Mills ‘Stellar’ 8ply, 50% Bamboo 50% wool, 437 yards (400 meters) 200 grams x 2 balls in Amethyst.
    Hook: US H/ 5mm
    Notions: yarn needle
  • Hook: US H/ 5mm
  • Notions: yarn needle

I worked on the shawl while getting ready for my sister's wedding! 


Any favourite fibre can be substituted, with corresponding hook. Bendigo ‘Stellar’ makes for a lovely winter shawl, with the thick, dense fabric.

Gauge: 10 stitches and 18 rows = 10 cm (4 “) in moss stitch (sc and ch)

Finished measurements are not given, as it it to be worked until desired width. (a good 'desired width' is your fingertip to fingertip length)

Every row begins with a chain loop that will create the border, and ends with an increase. All stitches are worked into chain spaces; which makes it so easy to identify where to place the hook.
Note: the first chain 1 space is between the increases of the previous row.


Pattern:
Make a chain of 7
Row 1: Skip 6 ch, (sc, ch 1, sc) in last ch, turn. (2 sc)
Row 2: Ch 6, (sc, ch 1) in ch-1 sp, (sc, ch 1, sc) in ch-6 sp, turn. (3 sc)
Row 3: Ch 6, (sc, ch 1) in ch-1 sp, (sc, ch 1) in next ch-1 sp, (sc, ch 1, sc) in ch-6 sp, turn. (4 sc)
Row 4: Ch 6, (sc, ch 1) in each ch-1 sp across, (sc, ch, sc) in ch-6 sp, turn.

Repeat Row 4 until desired width reached.

Final Row: Ch 6, (sc, ch 1) in each ch-1 sp across, sc in ch-6 sp.


Fasten off and weave in ends. 

US terms used
ch - chain
sc - single crochet
sp - space

I hope you enjoy making it as much as I have! 

If you like this free pattern, please consider a donation to Kofi - or sharing your project on social media! 

Copyright © 2020 Emma Wilkinson Designs All Rights Reserved

No restrictions are placed on finished items made with this pattern, however the pattern may not be resold or copied in any form. Pictures remain the property of Emma Wilkinson Designs